Posted on

Rock in a Jar: Polyamory

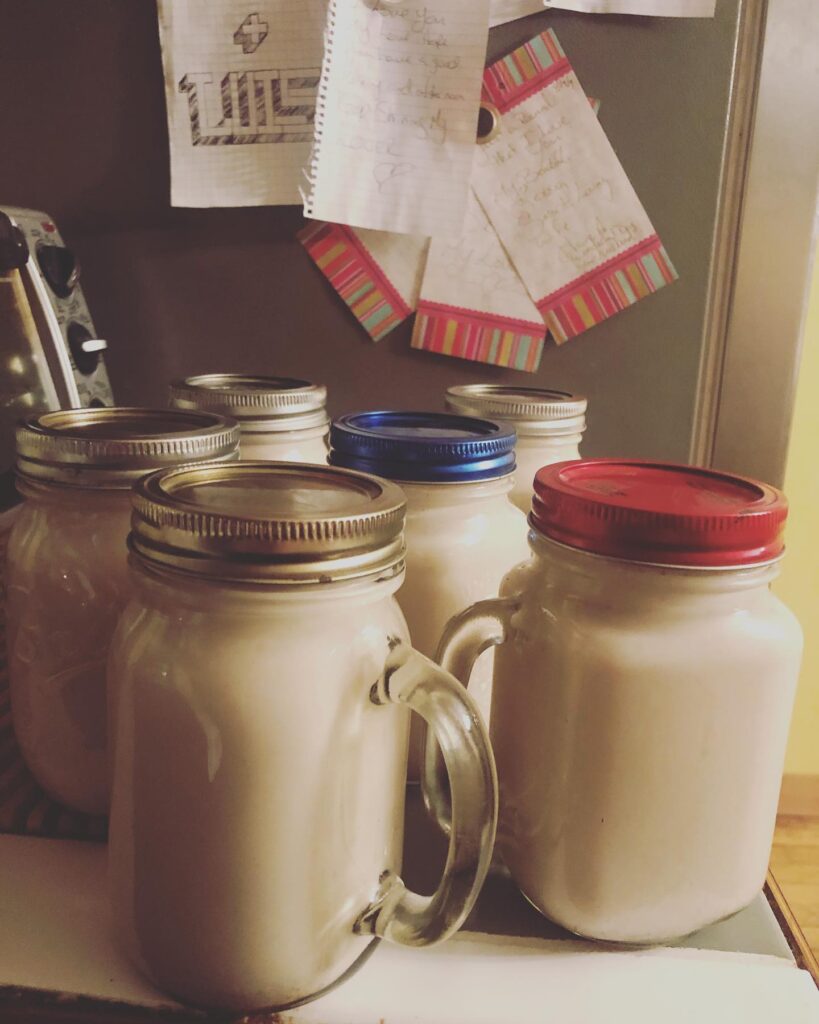
“Rocks in a Jar” is a time management concept that’s been popularized by author Stephen Covey. The story goes that a philosophy professor sets a large glass jar on a table in front of his students, then proceeds to fill it with fist-sized rocks. 

He asks the class, “Is the jar full?”  They agree that it is. Then he produces a bowl of pebbles and pours them into the jar, filling the spaces between the rocks. He repeats his question.

Warier now, the students are less willing to agree the jar is full. The professor then pours sand into the jar, which fills the remaining space among the rocks and pebbles.

The professor concludes by telling his class that the jar represents the time each of us has in a day. The large rocks represent the most important things in life like family, health, and relationships. The pebbles constitute other important but less meaningful things like work and school. The sand represents everything else – unimportant distractions. 

If we put the sand and pebbles into the jar first, there won’t be enough room to fit the larger, more important things. But if we are smart and put the rocks in first, all the less important things will naturally fall into place around them, and there will be room (and time) for everything.

It’s visually compelling, but like any metaphor, there are aspects to it that are over-simplified or carry deeper significance.  Here are some things in the rocks in a jar demonstration that we should think about as we practice polyamory.

Polyamory and Rocks in a Jar

We’re inside the jar.   For the demonstration, we’re on the outside looking in.  The reality is that we live inside the jar.  At very close range a pebble can look a lot like a rock, and it may be hard to tell when the jar is overflowing. Sand, just like at the beach, has a way of getting all over everything. Are you overcommitted? Polysaturated? To gain perspective, we have to deliberately pause, mentally separate ourselves, and make an assessment.  

It’s our jar.  In its rigidity and fragility, it’s an apt vessel to represent our time.  We can’t expand the jar, and if we try to cram too much in we risk breaking it. We can design our polycules however we choose as long as everyone involved enthusiastically consents, however, our resources, our jars, are finite. Part of being ethical, is ensuring space for everyone.

Watch for the Kryptonite.  If we’re not careful, some of the rocks and stones can turn out to be bad for us, the way Kryptonite is to Superman.  Allowing them into the jar poisons everything else.  Things like unhealthy relationships or unethical behaviors sap our strength and absorb time that we could otherwise devote to things or people that should matter more.  Inspect closely before adding anything to the jar and ask yourself “Is this a healthy person to invest my time in or do they belong in the jar at all?”

Our jar isn’t transparent.  Clear glass works well for the demonstration so students can see what is going on, but our real jar is opaque. People can’t look at us and immediately understand our priorities, wants, or needs. The only way others will know and can help support us is by what they see us do and what they hear us say. If we want healthy and happy relationships, it can help to talk about what we want and need and where our boundaries are.

They don’t show all the other jars. The demonstration is done with one jar representing one person’s time, but that’s not how polyamory works. It’s lots of people with lots of jars, and the stuff inside them interacts but doesn’t always align. What looks like sand in mine might be connected to a rather large pebble in a partner’s jar. 

You can dump out the jar.  However we choose to fill our jar, that’s not the end of the story; more like just one chapter.  When life happens, or circumstances change, it’s ok to dump out the jar, take some time to reflect, and start again.

In fact, we should probably examine the contents of our jar regularly. 

What’s in your jar?

Posted on

Coquito!

It’s coquito season! Don’t know what coquito is? Some folks call it Puerto Rican eggnog, but it has neither egg nor nog in it! It’s an absolutely delicious holiday drink! There are a million different recipes, but they all include some core basics. Here’s what you’re going to want to get:

  • 3 cups rum
  • 2 – 15oz cans Cream of Coconut
  • 2 – 14 oz cans sweetened condensed milk
  • 2 – 13.5 oz cans coconut milk
  • 8 oz evaporated milk
  • 1 tsp nutmeg
  • 1tsp cinnamon
  • 1tsp vanilla extract

A few notes from me:
For the rum: I use 2 cups Captain Morgan spiced rum and 1 cup Cruzan coconut rum. I highly recommend this combination.

Cream of Coconut is NOT the same as coconut milk! DO NOT try to substitute something else for Cream of Coconut. I recommend the Coco Lopez brand. You can usually find it with the drink mixers in the grocery store.

For the vanilla extract, I recommend using pure vanilla extract rather than imitation. Imitation vanilla comes from beaver butt glands. It’s true…see, you can read about it!

For the other ingredients, any brand, even store brand, is okay! Remember…we’re still mad a Goya and not buying their stuff!

Ok…now it gets complicated!

Put everything except the rum in a large bowl and use an immersion blender (or put it all in a blender and blend) until it’s all pureed together. Taste the rum to make sure it’s good. If it passes inspection (you might need to taste it twice to be sure), add the rum to the pureed mixture.

You made coquito! Put your coquito into glass jars and chill for at least 4 hours before drinking. This will last up to a month in the refrigerator. Enjoy coquito seaon!

Posted on

Autumn Olives Ketchup

I’ll be the first to admit that COVID social distancing has caused me to do some weird stuff…I’ve learned about paw paws and foraged for them and made several batches of muffins, I’ve made life-changing lemon muffins from yellow squash, I’ve painted a section of my living room purple, I got a cat…I could go on. Perhaps the strangest so far, to me, is autumn olives. I first heard about autumn olives about a month ago on a Facebook foraging group that a friend added me to after I started getting weird. That post took me down a couple hours-long Google hole as I researched all about autumn olives and what you can do with them. I decided I was going to try foraging for autumn olives and make ketchup!

One of the things I learned is that autumn olives are best after it has hard-frosted. Lucky for me <<sarcasm>> I live in the part of NY where it frosts early (but then gets to be 80 degrees during the day so you never know how to dress!). After three nights of frost, I figured it was time to go look for some autumn olives. I had heard there were a bunch growing down by the lake. I laced up my walking shoes and headed out on my quest. It’s beautiful by our lake – check out this funky driftwood lean-to I walked by. Even cooler, it had a Little Lending Library next to it…in the middle of nowhere…so super cool!

After about a half mile, I found some! Keep in mind, I had never seen an autumn olive before…I just had a couple of photos from the internet to search with. This is an autumn olive tree:

My recipe said I needed 4 cups of autumn olive pulp for ketchup, so I picked about 4 cups or so of autumn olives. It took me about a half hour. After that, I decided it was so gorgeous, I should get my 3 miles in for the day. I have to tell you I jumped off this bridge at least 1,000 times when I was a kid, and I camped in the park across from the autumn olives stash every summer. The lighthouse wasn’t there, but it’s a great addition!

Feeling absolutely fantastic and accomplished, I headed home to make ketchup!

So the first step to making ketchup is to run the autumn olives through a food mill. I don’t have a food mill, so I simmered them for about 3 minutes with a little water and smooshed them through a sieve. It’s easy!

A note about those seeds: autumn olives are INVASIVE. Don’t put them in your compost! Put them in the garbage to be disposed of.

Then, I learned a hard lesson. 4 cups of autumn olive berries only makes 1 cup of autumn olive pulp. Dang it. I’m 3 cups short! I have to go back out and pick more autumn olives. You can also use this break time to deal with anything else life might have thrown at you while you’re boondoggling weird foraging skills…for example, the dead red squirrel your cat left for you in the living room.

Ok, squirrel disposed of, another hour picking autumn olives…I’m feeling kind of “over” this experiment of mine. Nevertheless, she persisted.

Once you have your 4 cups of autumn olive pulp from 10-12 cups of autumn olive berries, you add maple syrup, apple cider vinegar, salt, and a sachet of cloves, cinnamon, peppercorns, mustard seed, and onion. This simmers until it’s ketchup consistency. It’s beautiful.

It took about 30 minutes of simmering for me to get a fantastic, rich ketchup consistency. Once that’s done, you pop it into jars…or, in my case, jar. Yes, after 2 hours of sweating in the sun picking autumn olives, squishing them, and cooking them, I got 1 small jar of ketchup. However, that jar is filled with DELICIOUSNESS! It doesn’t taste like Heinz ketchup…it tastes like bougie, artisan ketchup! When my husband tried it, he said, “I guess this is our ketchup from now on!”

Would I do this again if I wasn’t stuck in social distancing isolation? Maybe. It really is fantastic! But, the picking is a lot of work. Those berries are tiny! However, if I had a minion or a friend to help pick, I would definitely make it again!

Want to try it for yourself? Here’s the recipe I used with some notes:

Autumn Olives Ketchup

Ingredients

  • 4 cups autumn olive berry puree
  • 1/2 onion
  • 1/2 teaspoon whole peppercorns
  • 1/2 teaspoon whole mustard seed
  • 1/2 teaspoon whole allspice berries
  • 1/2 stick cinnamon
  • 1/8 teaspoon whole cloves
  • 1 1/2 teaspoon sea salt
  • 2 tablespoons apple cider vinegar
  • 1/2 cup maple syrup

Directions

  • Make autumn olive puree; you can simmer the berries with a small amount of water until soft (about 3 minutes) and squish them through a sieve OR put them through a Foley Food Mill
  • Place autumn olive puree in a crockpot with no lid and gently simmer until reduced by half (note: I didn’t do this step, I just skipped to the next one)
  • Put the puree in a medium sauce pan; tie onion and spices in a spice bag and add to the puree, along with the sea salt, vinegar, and maple syrup
  • Continue cooking until thick like ketchup – about 30 minutes. Stir frequently so you don’t scorch the puree
Posted on

MOC-ing LEGO City Police Monster Truck Heist (60245) and Donut Shop Opening (60233)

Have you ever loved parts of a LEGO set but wished they were just a little bit…more? It happens! When we get that feeling, we think about whether or not we can use the set as a base for a MOC! Most recently, we did this with the LEGO City Police Monster Truck Heist (60245) and Donut Shop Opening (60233) sets.

Here’s what happened with Police Monster Truck Heist: we loved the bank facade but didn’t really care about the vehicles. We also wanted a bank building and not just a facade.

To begin, we built the set and pulled a couple of other bank-type pieces we had laying around. It’s a super cute little set. We also had an ATM that Don Manuel had built and another little bank-type atrium.

Next, we started laying out our ideas for a bank. We imagined Scrooge McDuck owned the bank, so we wanted a vault so that he could dive into his money like he does in the cartoon.

Then, we added lots of green and gold!

Then, we completed the MOC, and since then, we have added goblins from Harry Potter’s Gringott’s bank to work in the bank, robbers planning a heist out back, and Iron Man sunbathing on the roof waiting to go to work. You’ll have to stay tuned to our YouTube to see those reveals though!

For Donut Shop Opening, Don Manuel and I have different approaches to MOC-ing sets. I like to build the set first and then modify it. He likes to start right off MOC-ing. So, I worked on the donut shop, and he worked on the toy store. Then, we put them together!

First, we needed to figure out what they would might look like together. We knew we wanted to keep them to one 32×32 baseplate. With some imagining and giggling, this is what we decided on. If you look closely, you can see that Don Manuel claimed all the extra space for the toy store! 🙂

Let’s start with the donut shop (because donuts are awesome!). I expanded and enclosed the building and added tables and chairs and patrons.

Don Manuel expanded the toy store, added lots of displays, and then added a second floor with apartments!

This is our finished product!

We love it! And the citizens of Moorogel love it! It will be featured on a future episode on our YouTube channel if you’re interested in more details and where it has landed in Moorogel 2.0!

So, if you are thinking about trying a MOC using a LEGO set as a base…do it! It’s LEGO, you can always take it apart and try again if you don’t love your first attempt!

Posted on

LEGO Creator Gingerbread House (10267 Build

When the LEGO Creator Gingerbread House came out last year, and we watched several online reviews of it, it didn’t look like a set we were interested in. We had the Winter Firehouse but decided not to get the Gingerbread House since our Lego city, Moorogel, didn’t really have a winter area. Fast forward to now and our upgraded and larger version of Moorogel, and we have a whole winter village happening! So…we decided to get the Gingerbread House to add another building to the winter village since it’s a little light on larger buildings at the moment (ok…the truth is…I might have ordered the Gingerbread House without telling Don Manuel, but…) Well! Am I ever happy we got it, because, in person, it’s an absolutely fantastic set!

To get started, there are 5 sets of bags, 2 instruction books, and 1 sticker sheet. The first set of bags and the first instruction book build all of the little accessories like the gingerbread people, baby carriage, snowblower, and Christmas tree and presents. I was absolutely smitten with these!

It was at this time that my build session was abruptly attacked by a feline who wanted to play too. It was cute…for a minute…until he decided whacking Lego pieces onto the floor was more fun. He had to go.

Once the rogue cat was removed, the gingerbread house build got underway. When I say that the build techniques on this set are super creative, fun, and awesome…I mean it!

I was making good progress when I got interrupted by cute grandsons photos, so I had to pause to “awwwwww”

Ok…back to work on the build! I’m having so much fun with it, I forget to take photos after each bag set. Also, in fairness, I’ve been interrupted several times at this point!

After this last step is when all hell breaks loose! I have lost track of time, and it is almost midnight on a work night, but I want to finish the build. Don Manuel is happily playing COD when I hear him freak out! Not in the “someone killed me” kind of way but in the “HELP” kind of way! A HUGE wolf spider was trotting across the living room floor…possibly to steal the tv…because this chica was ginormous. Well, when Don Manuel put a glass over it to trap it to get it outside, because it was wayyyy too big to squish, it spontaneously gave birth to approximately elevendybagillion itty bitty baby spiders. They scooted right out under that glass like it wasn’t there. By the time I got there from the other side of the living room, armageddon was underway! Look at this momma!

Woooooo! After getting the spider outside and the living room completely disinfected trying to get rid of our case of the heebie jeebies, I finished the build. AND I LOVE IT!

I can’t wait to get this incorporated into Moorogel’s new winter village! Keep an eye on our YouTube channel for an upcoming tour!

Posted on

LEGO Ideas The Flintstones Build

We were excited to get the LEGO Ideas The Flintstones set (21316)! We had been looking forward to seeing it IRL ever since we saw the mockups of it at Philly Brick Fest 2019! At Brick Fest, we got to sit in the authentic movie Flintstone Mobile…total #nerdgasm

But, I digress! The Flintstones set is awesome! I think all the Ideas sets turn out to be fan favorites. This set has 748 pieces: 6 bags, 1 instruction book, and NO STICKERS! All the cool pieces are printed!

I want to highlight just how innovative the build techniques for this set are! The house has two swing out attachments on the back to expand the living area. It is not fully enclosed when closed, which is a little disappointing as we tend to like complete buildings.

We have added the completed set to our Lego City, Moorogel. Somehow, it just weirdly seems to fit right in! It also inspired us. We are going to MOC up a bowling alley for Fred and Barney to work in since there’s no quarry in Moorogel.

Our recommendation? Pick up this set as soon as you can! You can get yours here

Note: As Amazon Affiliates, we may occasionally receive teeny tiny monetary compensation for purchases based on our recommendations.

Posted on

LEGO Ideas Dinosaur Fossils Build

Were we planning on getting the LEGO Ideas Dinosaur Fossils set (21320)? No. Did we get the LEGO Ideas Dinosaur Fossils set? Yes. Yes we did. Why did we get a set we weren’t intending to purchase? Well, because somewhere in there we decided our Lego city, Moorogel, needed a museum, and Erusa Ert was born! And, it needed dinosaur fossils, obvi.

6 bags, stickers, 3 instruction books for the 3 different dinos, and 910 pieces. Let us just say, these were quick builds. However, the piece usage was incredibly creative and the building techniques were super cool!

Our resident master bearded builder had fun with this!

All-in-all, we’re rather happy we picked up this set!

We have since installed the dinos in Erusa Ert, and they look fantastic! We’ll be uploading videos to our YouTube channel and Facebook in August, so stay tuned to see the completed museum. We did notice that we seem to have one issue with waking up to find drunk skeletons passed out on the floor of the museum. We’re not sure what’s going on, but we intend to find out! 🙂

Posted on

LEGO Friends The Television Series

We were FINALLY able to get our hands on the LEGO Friends The Television Series Set (21319)! It has 1070 pieces and includes stickers.

This was a fun build with interesting building techniques. We tend to LOVE the LEGO Ideas sets as they are created by fans like us and are often just super cool! With this build, we had some extra help too…the supervisor was really critical.

There were 6 bags to build with instructions.

We found the sideways builds for the throw rugs to be especially awesome!

We’re currently thinking about how to incorporate this into our LEGO city, Moorogel. We are considering doing a MOC with the Big Bang Theory set and turning it into a first floor shop with apartments above. We’ll see!

We recommend this set! Give it a try…if you can get your hands on one!

Posted on

Book Bites: Untamed

I absolutely LOVED Untamed by Glennon Doyle. It was a quick read, but it was incredibly thought-provoking and gave me lots to think about and consider. Other parts of it just resonate on a soul level.

In Untamed, Glennon openly and rawly tells the story of her untaming. Glennon was hiding from her discontent. Then, several years ago at a conference, she looked up and fell instantly in love with a woman, Abby Wambach. She decided to quit abandoning herself and to instead abandon the world’s expectations of her. She quit being good so she could be free. She quit pleasing and started living. It will make you laugh, cry, invigorate you, inspire you, and make you want to untame your life! Untamed shows us how to be brave. As Glennon urges us, “The braver we are, the luckier we get.”

Untamed is a loving call to action to live as your true self without compromise. Glennon says, “find what your makes your heart ache and follow it”.

Conclusion: READ THIS BOOK! You can get a copy here: